
A 3D scan adds real depth to a Care Pack, instead of a flat photo, your patient can rotate and zoom into their own scan. This article walks through exporting a scan from your scanning machine, adding it to a Chairside session, and sharing it in a Care Pack.
Table of contents
- Exporting Your Scan From the Machine
- Adding the Scan to a Session
- Including the Scan in a Care Pack
- What Your Patient Sees
- Why Add a 3D Scan
Exporting Your Scan From the Machine
3D scans are usually taken on a separate scanning machine, such as an iTero scanner. Chairside doesn't currently sync automatically or connect directly to these machines, scans are stored on their own separate machine, so they need to be exported and added to Chairside manually.
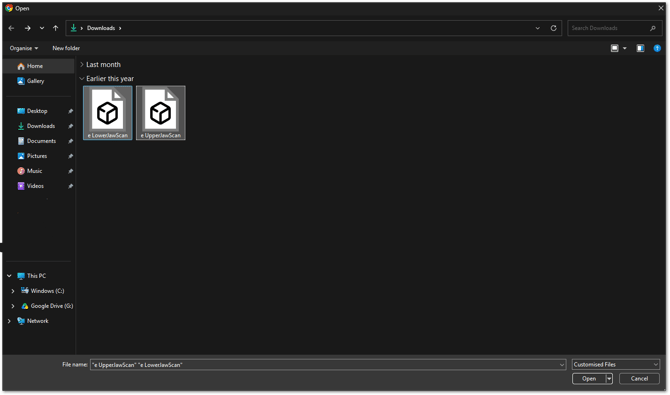
To do this, export the scan from the machine in .ply format.
Chairside doesn't currently connect directly to scanning machines. You'll need to export the scan as a .ply file first, then add it to Chairside as described below.
Adding the Scan to a Session
Once you have the .ply file exported:
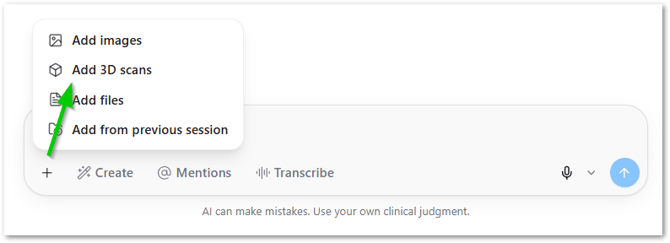
- Click the + icon.
- Click Add 3D Scan.
- Add the upper and lower jaw scans.
- Click the blue arrow icon in the chat bar to upload the scans.
Including the Scan in a Care Pack
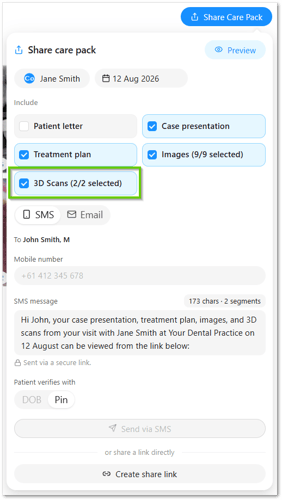
Once your 3D scan is imported, go to share the Care Pack as usual. Before sending, use the preview to check exactly what your patient will see, and make sure the 3D scan option is ticked.
What Your Patient Sees
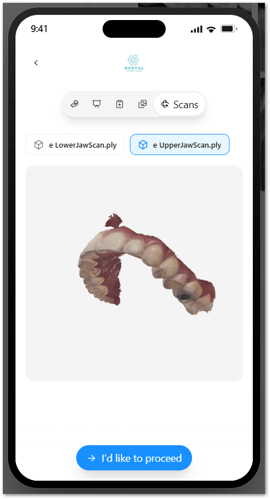
Once they open their Care Pack, patients can zoom in, zoom out, and rotate the 3D scan to see it from any angle.
Why Add a 3D Scan
Based on our data, patients are 1.7x more likely to book ahead when a 3D scan is included in their Care Pack, giving them something to genuinely explore, rather than just read or look at, tends to make the treatment feel more real and more theirs.