
For: Dentists, DAs, and OHTs · Read time: ⏱️ ~2 min
Good transcription starts with good audio. Most clinicians can get excellent results using the equipment they already have, provided the microphone is positioned well and configured correctly.
Before You Start
A few things to check before your first consultation:
- Microphone access – Chairside needs permission to use your device's microphone. You'll be prompted the first time you start a session.
- Choose your microphone – You can use your laptop's built-in microphone, a tablet microphone, or an external microphone.
- Test it first – A quick test before your first patient is much easier than troubleshooting during a consultation.
Check Your Audio Settings
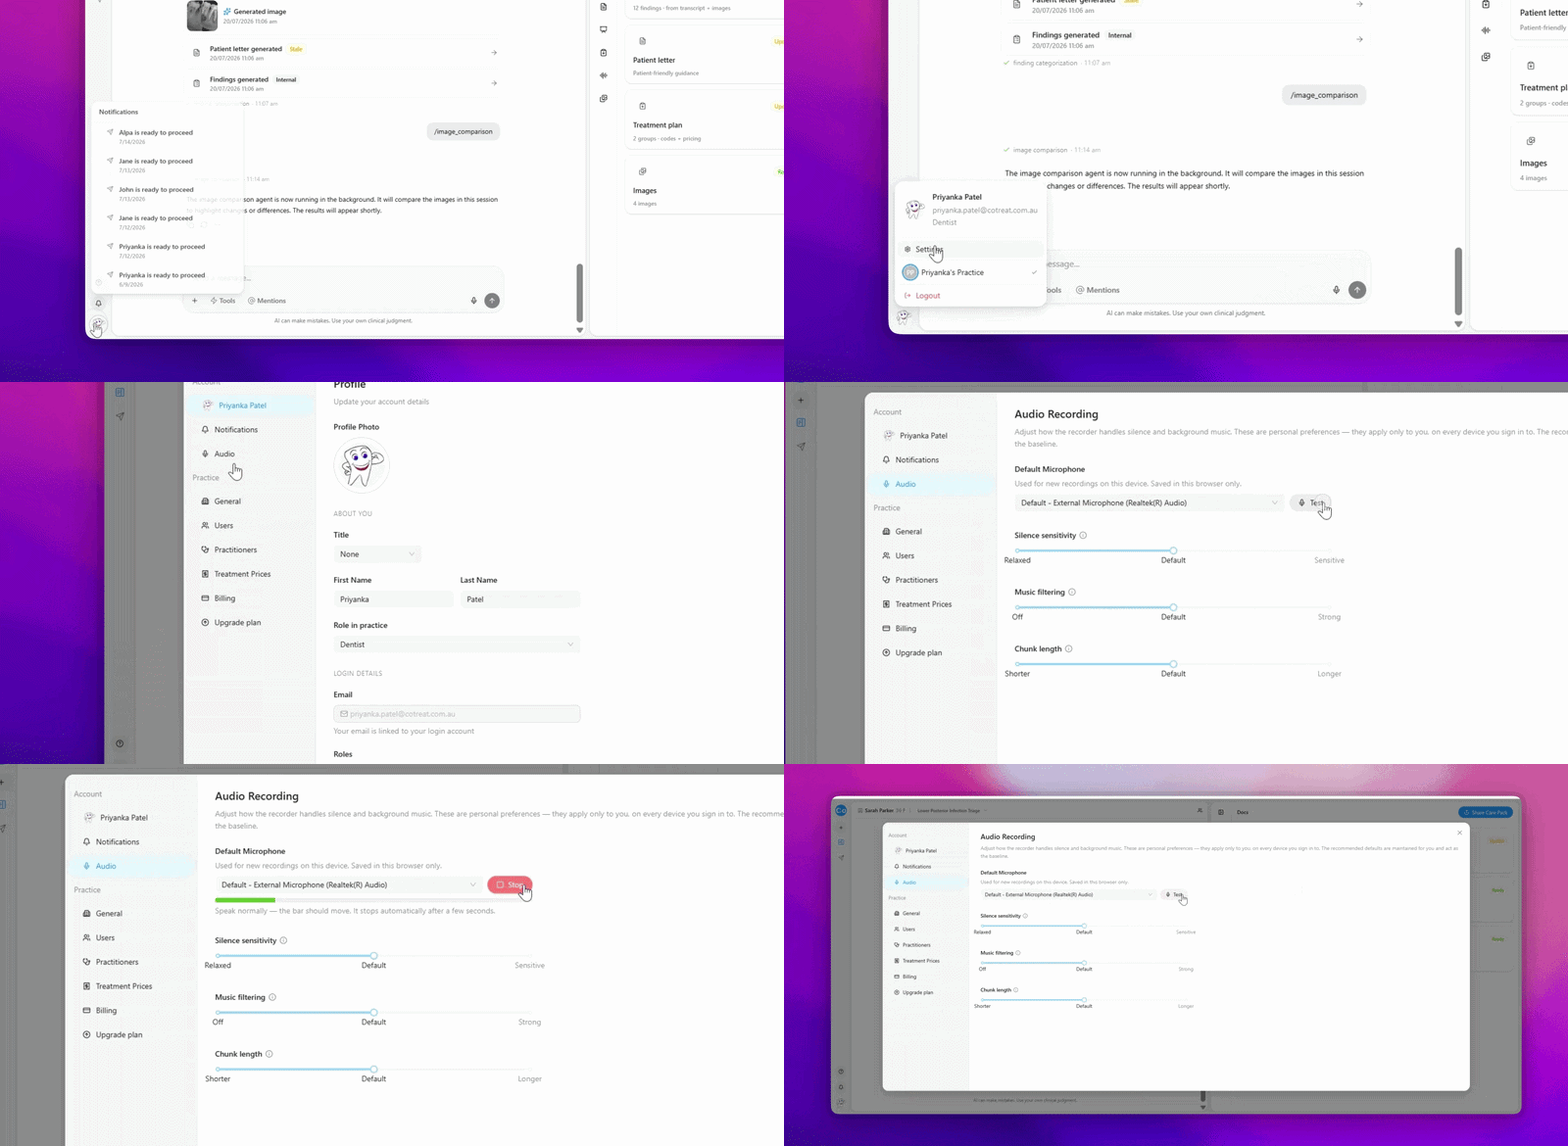
Open Settings → Audio to manage your recording preferences.
From here you can:
- Select your default microphone.
- Test that Chairside can hear you.
- Adjust recording preferences if needed.
For most users, the default settings work well and don't require any changes.
Choosing a Microphone
There's no single right answer. The best setup depends on your room, your workflow and what equipment you already have available.
Clip-on or Lapel Microphones
Worn on clothing and positioned close to the conversation.
These often provide the most consistent audio quality, particularly if you move around the room during consultations.
Desktop or Conference Microphones
Placed on the desk or treatment room workstation.
These work well when positioned centrally between the clinician and patient.
Built-in Device Microphones
The simplest option.
No additional setup is required and they're often a perfectly good starting point. In larger rooms, however, patients may sound quieter if they're seated further away from the device.
💡 Start with whatever you already have. If transcription quality isn't where you'd like it to be, it's usually worth adjusting microphone placement before investing in new equipment.
Understanding the Recording Settings
Chairside includes a few optional settings that help tailor recording behaviour to your environment.
Silence Sensitivity
Controls how Chairside handles pauses in conversation.
- Relaxed – Better for consultations with longer pauses.
- Default – Recommended for most users.
- Sensitive – More responsive to short pauses in speech.
Music Filtering
Reduces background music and environmental noise.
- Off – Captures all audio.
- Default – Recommended for most practices.
- Strong – More aggressive filtering of background sounds.
⚠️ Strong filtering may occasionally remove quiet speech along with background noise.
Chunk Length
Determines how audio is processed during recording.
For most clinicians, the default setting provides the best balance.
Getting the Best Results
Position the microphone somewhere between yourself and the patient where possible.
Try to keep it away from:
- Suction units
- Compressors
- Air conditioning vents
- Background music sources
💡Chairside performs best when important findings are discussed clearly, relevantly.
For eg. Instead of saying "This one needs treatments" , say , "Tooth 36 has decay and will require a restoration."
The more clearly findings are discussed, the more useful the generated notes tend to be.
Troubleshooting
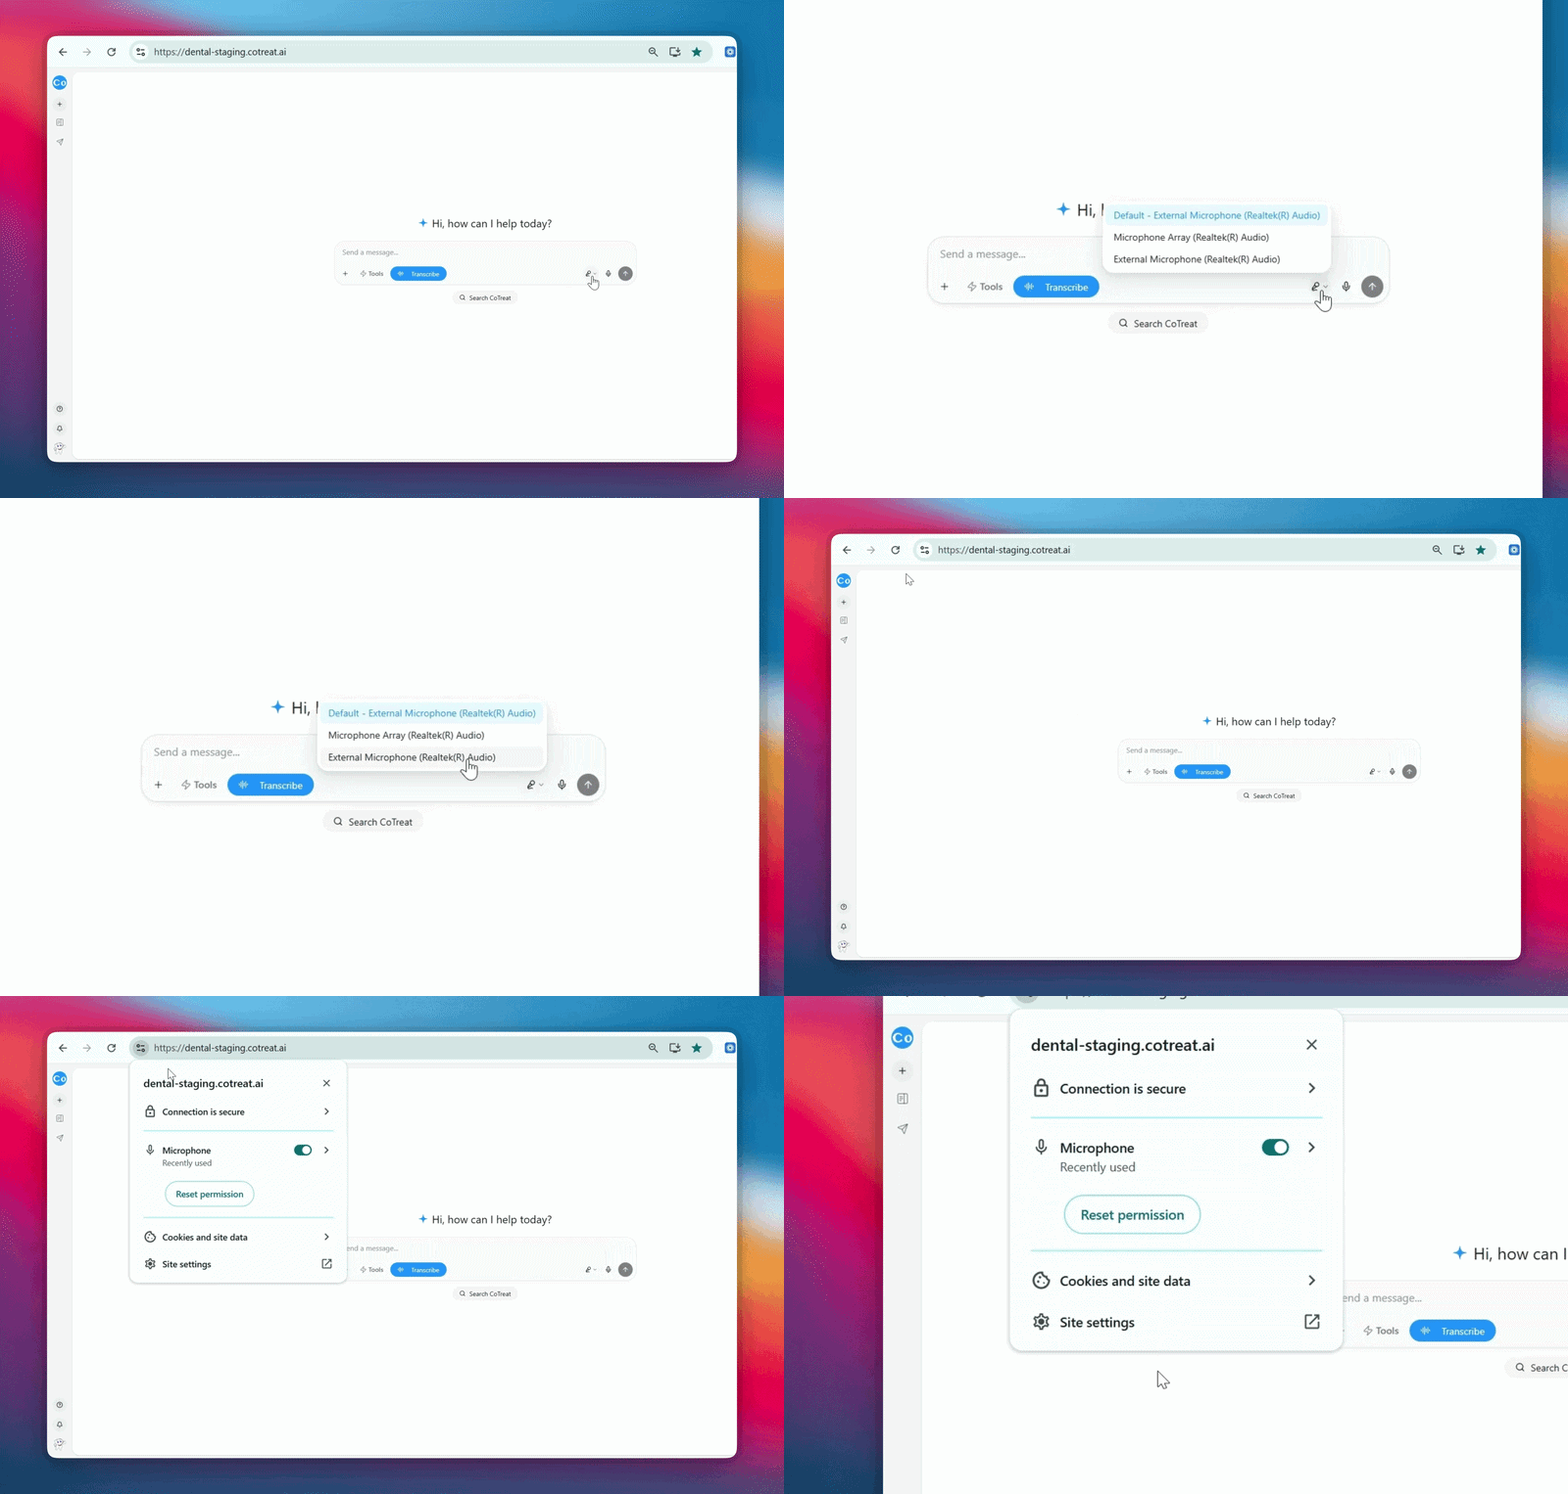
Chairside Isn't Picking Up Any Audio
Check Browser Permissions
Your browser must be allowed to access the microphone.
Chrome / Edge
- Select the lock icon beside the website address.
- Locate Microphone permissions.
- Change access to Allow.
- Refresh the page.
Safari
- Open Safari Settings.
- Select Websites.
- Open Microphone.
- Allow microphone access for Chairside.
Transcript Quality Is Poor or Inconsistent
Before adjusting any settings, confirm Chairside is using the microphone you expect.
If you're using headphones, a headset, or an external microphone, check that it is selected under Settings → Audio → Default Microphone. Connecting a new device does not always automatically switch the active recording source.
Also check for:
- Background conversations
- Music playing nearby
- Air conditioning or other environmental noise
- Multiple microphones connected at the same time
If you're working in a noisy environment (eg. shared workspace), transcription quality may be affected. Adjusting Music Filtering may help, but a quieter environment will generally produce better results.
The Patient's Voice Is Missing or Very Quiet
This is usually a microphone positioning issue.
Try moving the microphone closer to where the patient sits or repositioning it so both speakers are equally audible.
A centrally positioned desktop microphone or lapel microphone often improves consistency.
The Transcript Seems Incomplete
If generated notes, summaries, or letters appear incomplete, the transcript may still be processing.
Wait until transcription has finished before generating outputs such as:
- Clinical Notes
- Patient Letters
- Transcript Summaries
- Feedback
Generating outputs too early may result in incomplete content because Chairside hasn't yet processed the full consultation.
Regenerating Doesn't Improve the Output
Regenerating notes or letters can improve formatting and phrasing, but it cannot recover audio that was never captured.
If parts of the consultation are missing from the transcript, review your microphone setup and recording quality before regenerating outputs.
What Happens Next?
Once your microphone is configured correctly, you're ready to record consultations, generate clinical notes and create Care Packs with confidence.
A few minutes spent checking your setup can make a significant difference to every transcript that follows.